« Fournisseur de service OAuth2 Google(administration) » : différence entre les versions
Aucun résumé des modifications |
Aucun résumé des modifications |
||
| (2 versions intermédiaires par le même utilisateur non affichées) | |||
| Ligne 9 : | Ligne 9 : | ||
Il s'agit de | Il s'agit de | ||
# Créer un nouveau projet | |||
# Ajouter l'API Google calendar à ce projet | |||
# Créer l'écran d'autorisation OAuth | |||
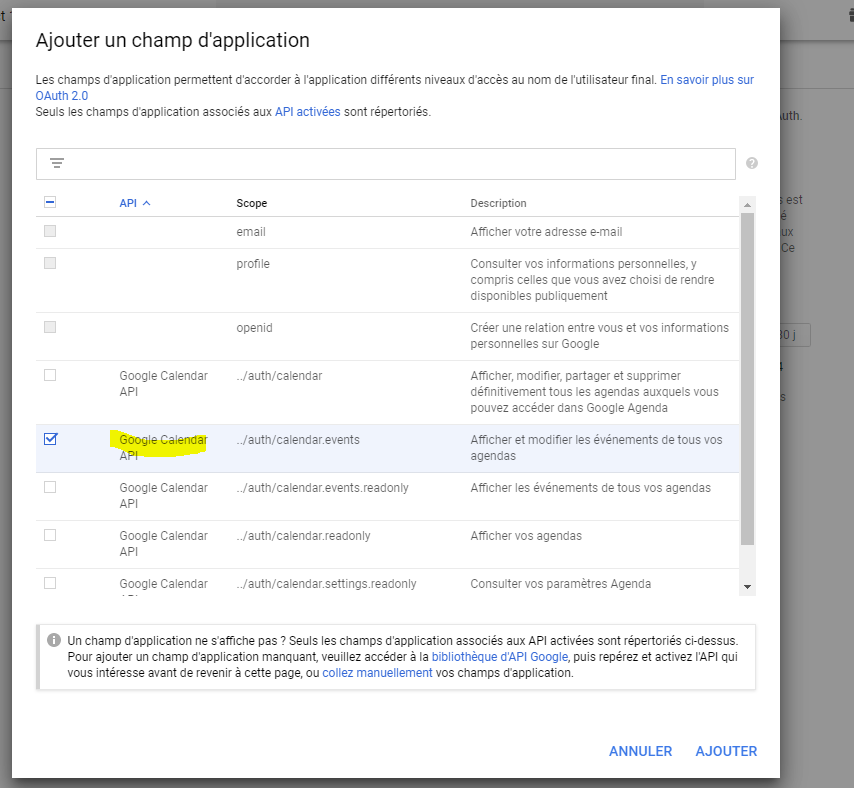
# Ajouter à l'écran d'autorisation OAuth le champs d'application Google calendar | |||
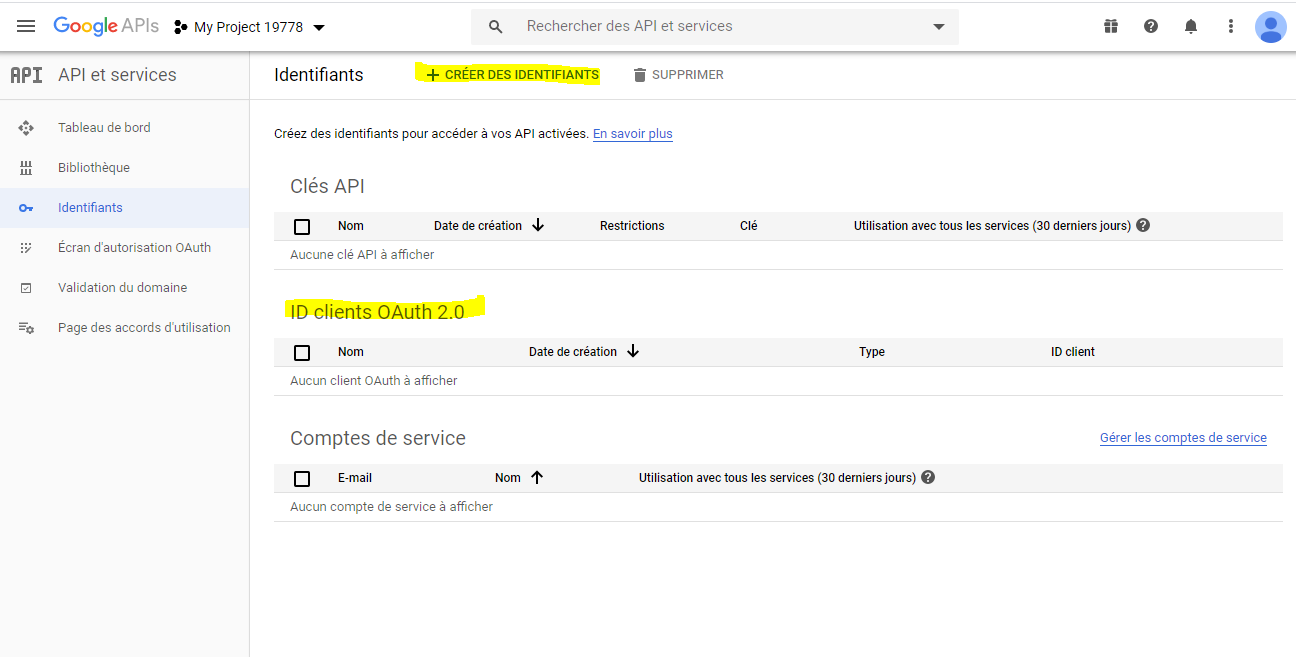
# Créer un identifiant OAuth2 (afin d'obtenir le clientID et le clientSecret) | |||
# Paramétrer l'adresse de rappel adéquate https://[hôte]/oauth2_success_2.l1000 (ou bien https://[hôte]/[nom du service]/server/oauth2_success_2.l1000 si IIS est utilisé) | |||
==Exemple== | ==Exemple== | ||
[[image:auth_srv_google_1.png]] | |||
[[image:auth_srv_google_2.png]] | |||
[[image:auth_srv_google_4.png]] | |||
[[image:auth_srv_google_5.png]] | |||
[[image:auth_srv_google_6.png]] | |||
[[image:auth_srv_google_7.png]] | |||
[[image:auth_srv_google_8.png]] | |||
[[image:auth_srv_google_9.png]] | |||
[[image:auth_srv_google_10.png]] | |||
[[image:auth_srv_google_11.png]] | |||
Dernière version du 15 mai 2020 à 13:50
Prérequis
Il est nécessaire de détenir un compte GSuite
Les utilisateurs doivent être créés.
Paramétrage
Il s'agit de
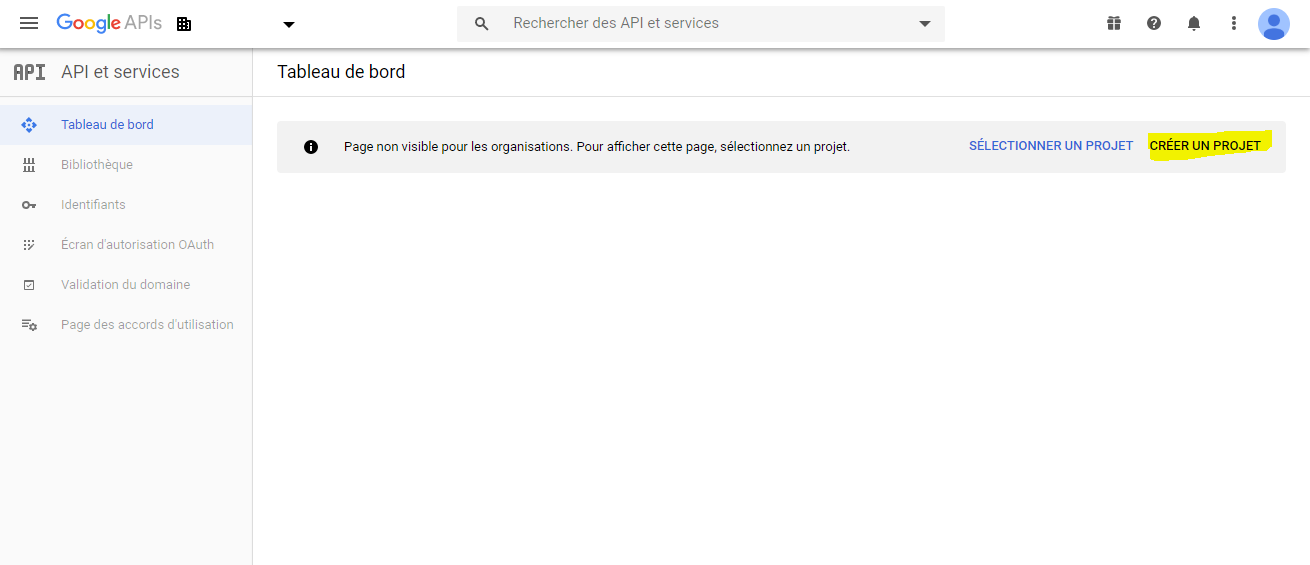
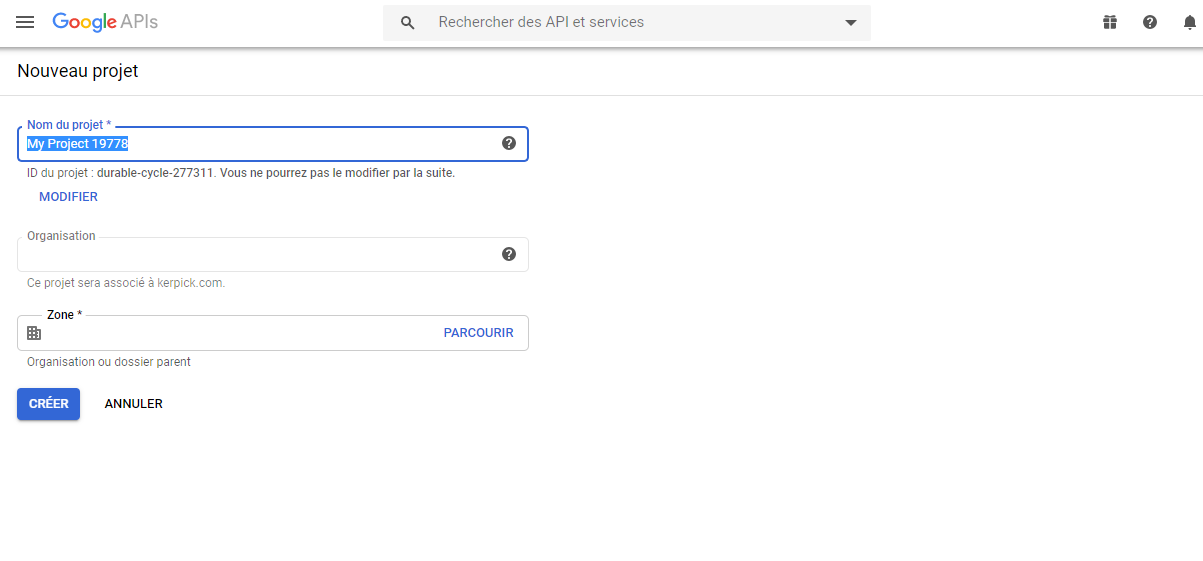
- Créer un nouveau projet
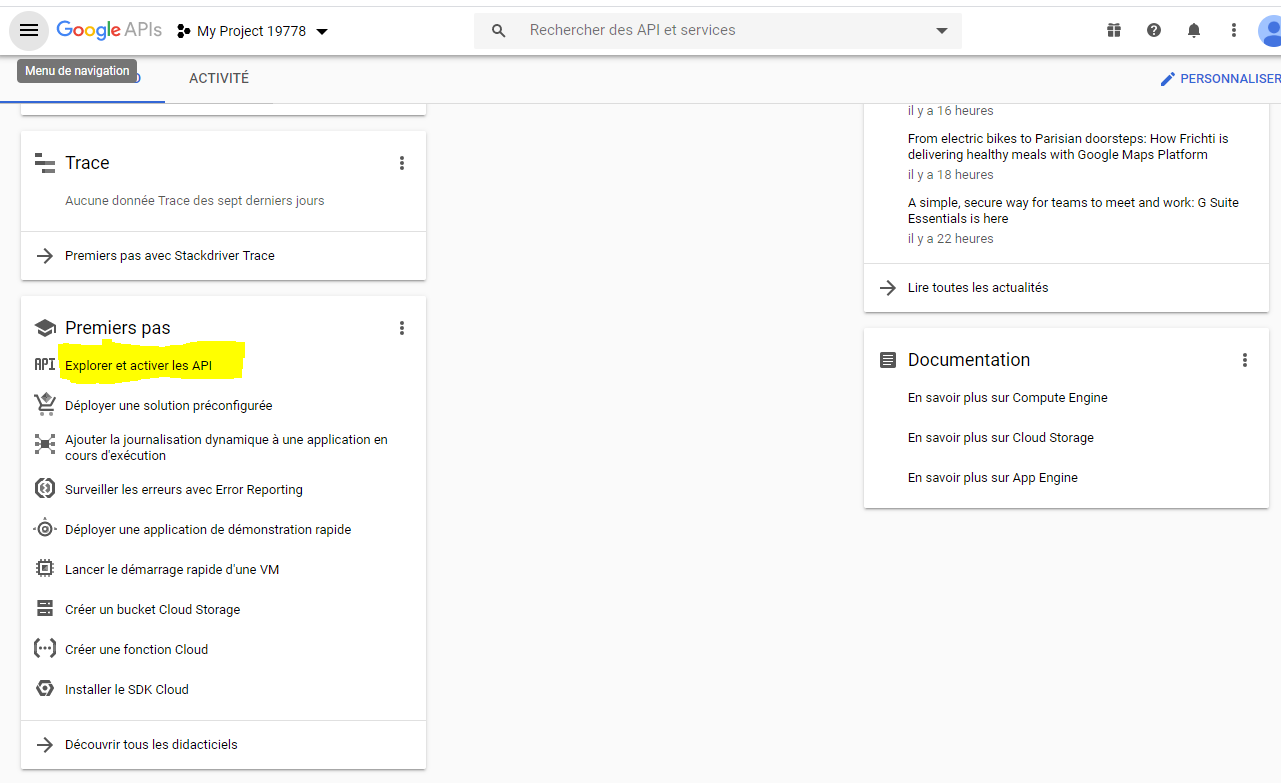
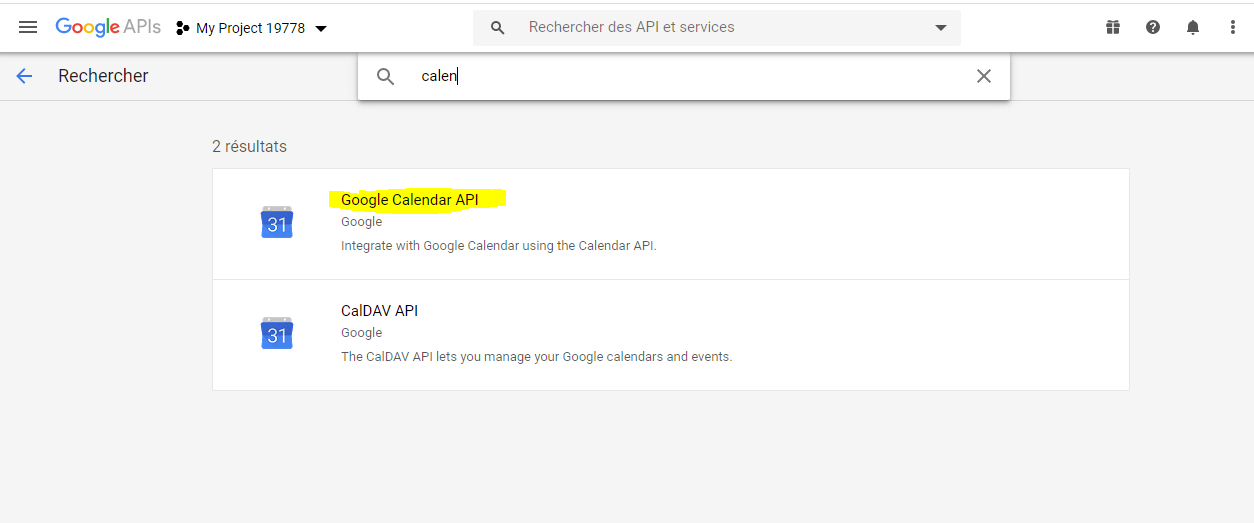
- Ajouter l'API Google calendar à ce projet
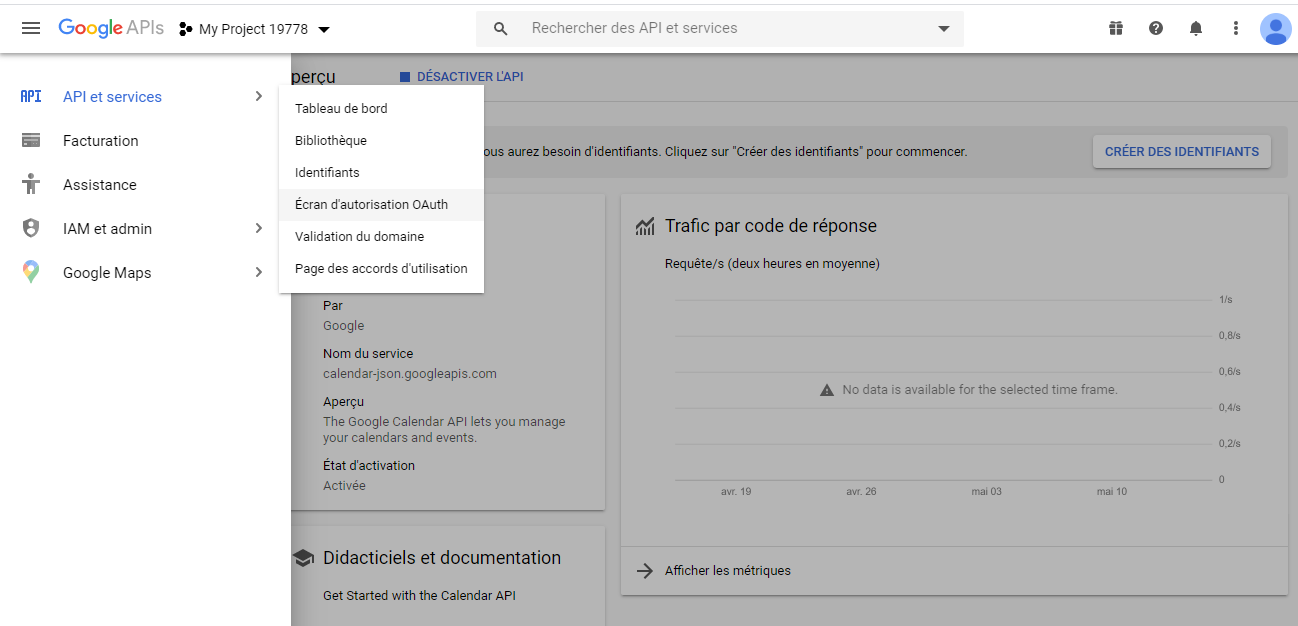
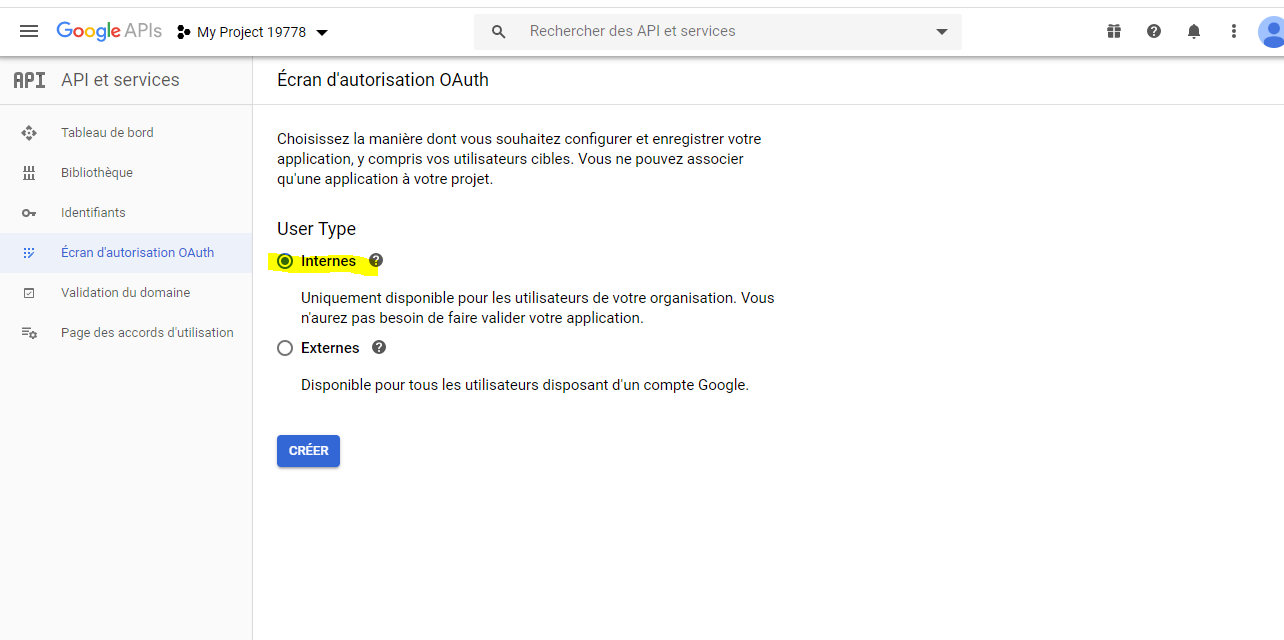
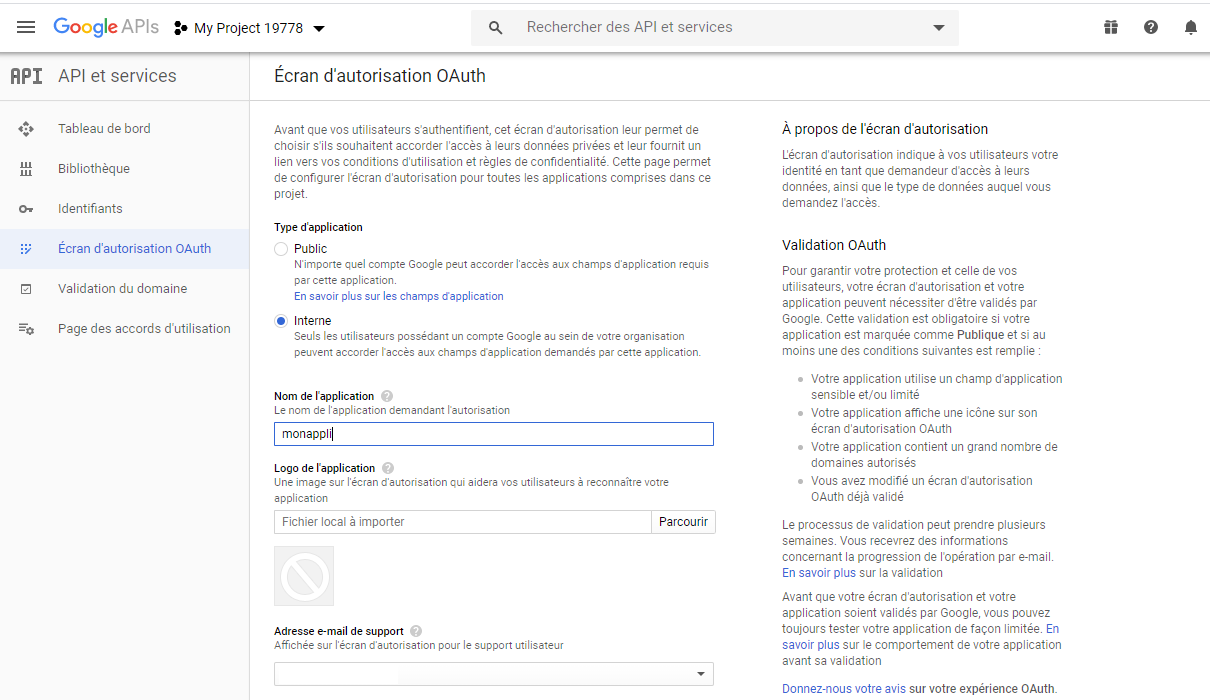
- Créer l'écran d'autorisation OAuth
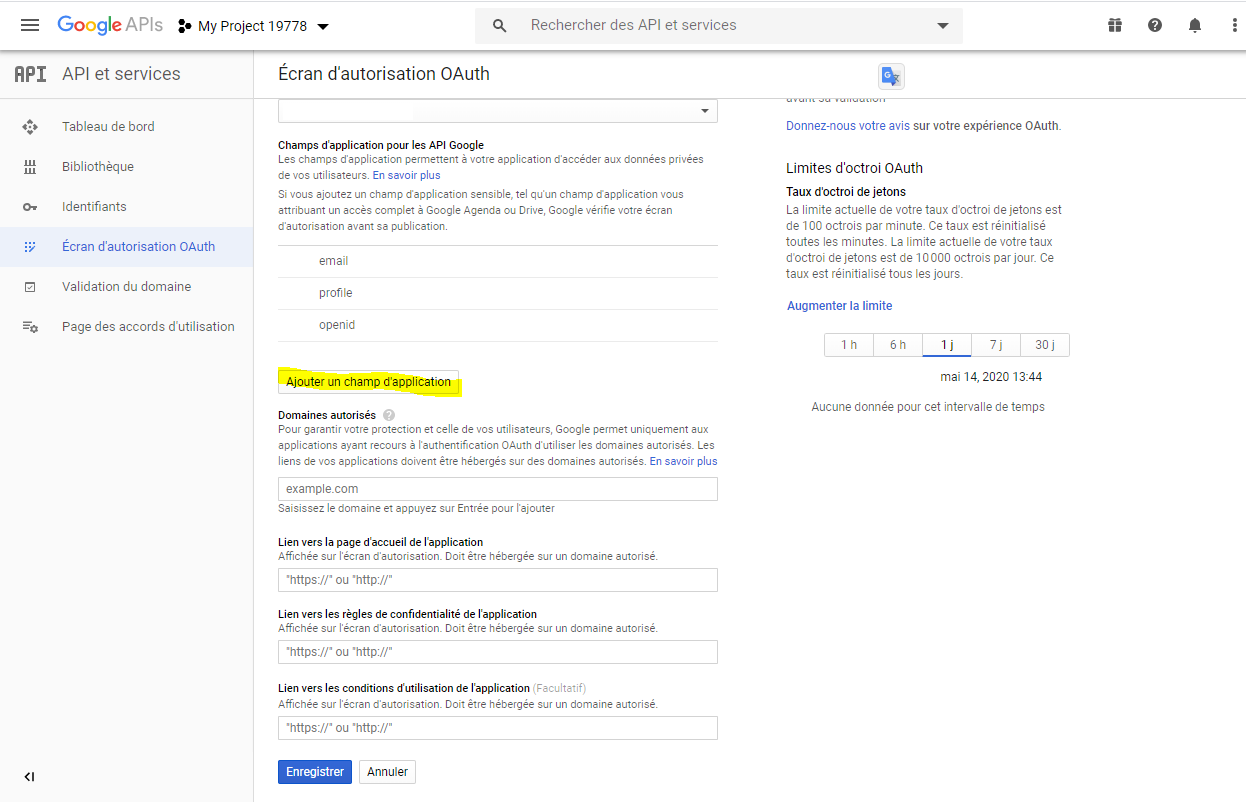
- Ajouter à l'écran d'autorisation OAuth le champs d'application Google calendar
- Créer un identifiant OAuth2 (afin d'obtenir le clientID et le clientSecret)
- Paramétrer l'adresse de rappel adéquate https://[hôte]/oauth2_success_2.l1000 (ou bien https://[hôte]/[nom du service]/server/oauth2_success_2.l1000 si IIS est utilisé)

